When hunters and precision shooters look for reliable data on 100% copper, lead-free ammunition, they consult a barnes ballistics chart. This chart provides the exact performance metrics, including muzzle velocity, muzzle energy, ballistic coefficient, and bullet drop, for popular Barnes product lines like the VOR-TX, TSX, TTSX, and LRX. Because monolithic copper bullets retain nearly 100% of their weight and expand differently than traditional lead-core bullets, understanding their specific flight path is critical for ethical hunting and accurate long-range shooting. In this article, you will find a highly detailed, research-backed breakdown of factory Barnes ammunition ballistics, followed by an in-depth guide on how to interpret each metric for real-world application. Note that environmental conditions, specific barrel lengths, and atmospheric variables can subtly alter these baseline specifications.
Barnes Ballistics Chart
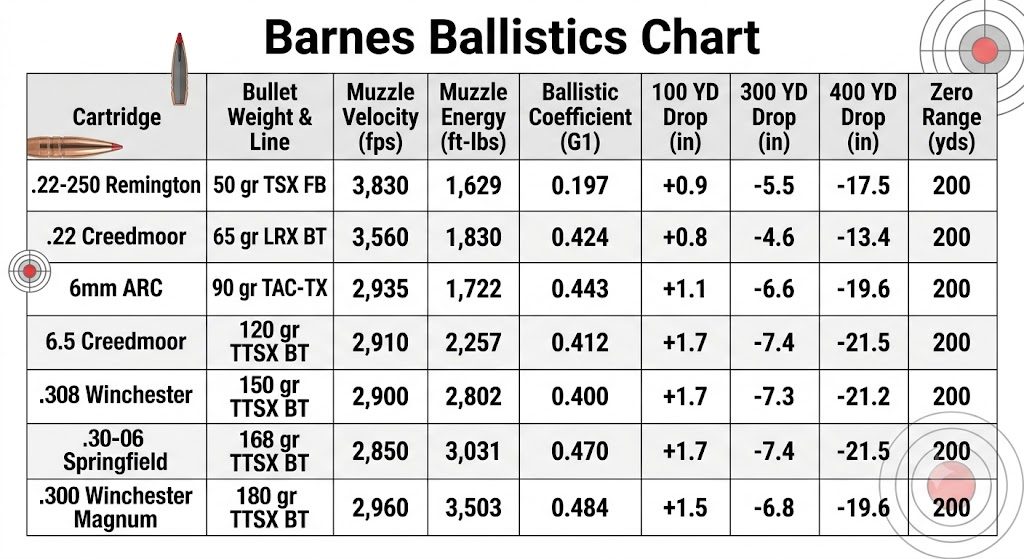
The following data reflects factory specifications for popular Barnes VOR-TX and VOR-TX LR (Long Range) ammunition tested under standard atmospheric conditions. Trajectory data assumes a 200-yard zero.
| Cartridge | Bullet Weight & Line | Muzzle Velocity (fps) | Muzzle Energy (ft-lbs) | Ballistic Coefficient (G1) | 100 YD Drop (in) | 300 YD Drop (in) | 400 YD Drop (in) | Zero Range (yds) |
| .22-250 Remington | 50 gr TSX FB | 3,830 | 1,629 | 0.197 | +0.9 | -5.5 | -17.5 | 200 |
| .22 Creedmoor | 65 gr LRX BT | 3,560 | 1,830 | 0.424 | +0.8 | -4.6 | -13.4 | 200 |
| 6mm ARC | 90 gr TAC-TX | 2,935 | 1,722 | 0.443 | +1.1 | -6.6 | -19.6 | 200 |
| 6.5 Creedmoor | 120 gr TTSX BT | 2,910 | 2,257 | 0.412 | +1.7 | -7.4 | -21.5 | 200 |
| .308 Winchester | 150 gr TTSX BT | 2,900 | 2,802 | 0.400 | +1.7 | -7.3 | -21.2 | 200 |
| .30-06 Springfield | 168 gr TTSX BT | 2,850 | 3,031 | 0.470 | +1.7 | -7.4 | -21.5 | 200 |
| .300 Winchester Magnum | 180 gr TTSX BT | 2,960 | 3,503 | 0.484 | +1.5 | -6.8 | -19.6 | 200 |
Understanding the Chart
To maximize your success in the field or on the range, you must understand exactly what the numbers on a ballistics chart mean. Below is a comprehensive breakdown of every column included in the table above.
Cartridge
What it means: This column identifies the specific caliber and chambering of the firearm (e.g., .308 Winchester or 6.5 Creedmoor).
Why it matters: Ammunition must be matched perfectly to the firearm’s chamber. The cartridge dictates the case capacity, maximum pressure limits, and overall ballistic potential of the round.
How to interpret it: Use this column simply to locate the exact ammunition you are shooting. Never try to extrapolate data from a similar cartridge; a .308 Winchester and a .300 Winchester Magnum may both fire a .30 caliber bullet, but their performance profiles are drastically different.
Real-world performance: The cartridge determines the foundational power and recoil of your rifle. A larger cartridge casing holds more powder, generally pushing the bullet faster and farther.
Common mistakes: A frequent misconception is confusing cartridges that sound similar, such as 6.5 Grendel and 6.5 Creedmoor. Always ensure the cartridge listed on the chart perfectly matches the stamp on your rifle barrel.
Bullet Weight & Line
What it means: This denotes the mass of the projectile measured in grains (gr) and the specific Barnes bullet family (e.g., TSX, TTSX, LRX, or TAC-TX).
Why it matters: Bullet weight directly impacts velocity, wind resistance, and terminal energy. The “Line” indicates the bullet’s construction. For instance, the TTSX (Tipped Triple-Shock X) features a polymer tip for better aerodynamics and faster expansion, while the LRX (Long-Range X) is optimized for extended distances.
How to interpret it: Heavier bullets for a given caliber typically fly slower but resist wind better and penetrate deeper. The specific line tells you the bullet’s intended purpose (hunting, tactical, or long-range).
Real-world performance: Because Barnes bullets are solid copper, they retain nearly 100% of their weight upon impact. For example, a 150-grain Barnes TTSX will often out-penetrate a traditional 180-grain lead-core bullet because the lead bullet sheds fragments and loses mass.
Common mistakes: Many hunters transitioning to monolithic copper bullets make the mistake of choosing the same heavy grain weights they used with lead. Because copper is lighter than lead but retains its mass perfectly, it is highly recommended to drop down a weight class (e.g., shooting a 150-grain Barnes instead of a 165-grain lead bullet) to achieve higher velocity for reliable expansion.
Muzzle Velocity (fps)
What it means: Muzzle velocity is the speed of the bullet at the exact moment it exits the rifle’s barrel, measured in feet per second (fps).
Why it matters: Velocity is the engine of ballistics. It dictates how flat a bullet will shoot, how hard it will hit, and whether a hollow-point or polymer-tipped bullet will successfully expand upon impact.
How to interpret it: Higher numbers mean a faster-traveling bullet. This speed will steadily decrease as the bullet travels downrange due to aerodynamic drag.
Real-world performance: Monolithic copper bullets like the Barnes TSX and TTSX require high velocities to peel back into their signature four-petal expansion. If the bullet slows down too much before reaching the target, it may punch straight through without expanding.
Common mistakes: The muzzle velocity on a factory chart is generated using an industry-standard test barrel (often 24 inches). If you shoot a short-barreled rifle (like an 18-inch hunting carbine), your actual muzzle velocity will be lower than what is printed on the chart.
Muzzle Energy (ft-lbs)
What it means: Muzzle energy measures the destructive kinetic power of the bullet as it leaves the barrel, expressed in foot-pounds (ft-lbs).
Why it matters: Energy is a primary indicator of a cartridge’s stopping power. It is calculated using a combination of the bullet’s weight and its velocity.
How to interpret it: A higher foot-pound rating indicates a more powerful cartridge. However, you must also consider the bullet’s downrange energy, not just its energy at the muzzle.
Real-world performance: Ethical hunting requires specific minimum energy thresholds upon impact, typically around 1,000 ft-lbs for deer-sized game and 1,500 ft-lbs for elk. The muzzle energy shows you the round’s maximum potential before atmospheric drag takes its toll.
Common mistakes: A common misconception is that muzzle energy alone kills game. Energy must be paired with proper bullet placement and reliable bullet expansion to cause the necessary terminal damage.
Ballistic Coefficient (G1)
What it means: The Ballistic Coefficient (BC) is a mathematical value that represents a bullet’s aerodynamic efficiency. The standard measurement model for most flat-based and standard boat-tail hunting bullets is the G1 model.
Why it matters: A bullet with a high BC slices through the air more efficiently, meaning it retains its velocity longer, drops less over distance, and is less affected by crosswinds.
How to interpret it: The higher the BC number, the more aerodynamic the bullet. For example, the .300 Win Mag 180 gr TTSX has a BC of 0.484, making it highly efficient at slicing through the air compared to the .22-250’s 50 gr TSX at 0.197.
Real-world performance: Inside of 200 yards, BC matters very little. However, once you shoot past 300 yards, a high BC becomes the most critical factor in ensuring your bullet still carries enough velocity to expand and hits exactly where you are aiming.
Common mistakes: Shooters often obsess over BC without considering the application. A low-BC, round-nose bullet is devastating in thick brush at 75 yards, whereas a high-BC bullet is only necessary for open plains and long-range pursuits.
100 YD Drop (in)
What it means: This shows where the bullet impacts relative to the shooter’s line of sight at a distance of 100 yards, measured in inches.
Why it matters: Because gravity acts on a bullet the instant it leaves the barrel, the barrel must be angled slightly upward. This causes the bullet’s trajectory to arc, crossing the line of sight twice.
How to interpret it: You will notice these numbers are positive (e.g., +1.7 inches). Because the rifle in this chart is zeroed at 200 yards, the bullet is still on the upward slope of its arc at 100 yards, meaning it will strike roughly an inch and a half high at that distance.
Real-world performance: If a deer steps out at 100 yards and you are zeroed for 200, you know you need to aim slightly lower than your intended impact point, or simply hold dead center, as a 1.7-inch variance is perfectly acceptable within the vital zone of medium game.
Common mistakes: Shooters often confuse “drop” with “impact.” A positive drop number actually means a high impact relative to the crosshairs.
300 YD Drop (in)
What it means: This metric dictates how far below the center of the crosshairs the bullet will strike at exactly 300 yards.
Why it matters: This is the distance where gravity begins to severely punish bullets. Knowing this exact negative value tells you how much elevation adjustment (holdover) is required to hit the target.
How to interpret it: A value of -7.4 inches means you must aim exactly 7.4 inches above your desired impact point to hit the target.
Real-world performance: For cartridges like the 6.5 Creedmoor or .30-06, a 300-yard drop of 7.4 inches means you can comfortably place the crosshairs at the very top edge of a deer’s shoulder and drop the bullet perfectly into the center of the heart/lung area without dialing your scope.
Common mistakes: Failing to verify this number in real life. While the chart says -7.3 inches, varying altitudes and slightly different muzzle velocities can easily turn that 7.3 inches into 9 inches on the actual range.
400 YD Drop (in)
What it means: This indicates the bullet’s total vertical drop in inches at a distance of 400 yards relative to the line of sight.
Why it matters: 400 yards is approaching the maximum ethical hunting range for many shooters. At this distance, the bullet is shedding velocity rapidly, and the trajectory is plunging drastically.
How to interpret it: The values here are significantly larger (e.g., -21.5 inches). This is a stark visual representation of how quickly trajectory degrades.
Real-world performance: You can no longer rely on simple “holdover” guesswork at 400 yards. To compensate for a 21-inch drop, shooters must either use a ballistic reticle with specific subtensions (hash marks) or dial the elevation turret on their rifle scope.
Common mistakes: Relying solely on the chart for a 400-yard shot is a major error. At 400 yards, factors like barometric pressure, temperature, and scope height, which are not factored into a generalized chart, will absolutely change the point of impact.
Zero Range (yds)
What it means: The distance at which the rifle’s sights (or optic) are calibrated so that the point of aim exactly matches the bullet’s point of impact.
Why it matters: The zero range dictates the entire arc of the trajectory. The drops at 100, 300, and 400 yards are entirely mathematically dependent on this zero distance.
How to interpret it: In this chart, the value is 200 yards. This means that at exactly 200 yards, the bullet will hit dead-center where the crosshairs are aimed (0.0 inches of drop).
Real-world performance: A 200-yard zero is considered the gold standard for most modern centerfire hunting cartridges. It maximizes the “Maximum Point Blank Range,” meaning a hunter can hold dead-center on a target’s vital zone from 0 to about 250 yards without needing to adjust their aim at all.
Common mistakes: Many shooters sight their rifles in at 100 yards but try to use a ballistics chart based on a 200-yard zero. If your rifle is zeroed at 100 yards, your drop at 300 and 400 yards will be much more severe than what is printed in a 200-yard zero chart. Always verify that your physical rifle zero matches the chart’s baseline data.